Free shipping on orders over $100! **After discounts have been applied & Continental US only

Modern Masters

All Things Rust & Patina – Exploring the Possibilities

I have been using the Modern Masters Patina finishes for many many years!  Some of you may remember a few others they used to have like “Baroque”.  YES, I’m as sad as you, I wish they still had that one too!!  But, from what I understand, it had an issue with exploding… LOL!!  Yeah, that is the reason Baroque is gone!!

But my personal LOVE of all things Patina and Rust has been going strong for some time now; maybe close to 20 years 🙂  I have been obsessed with the incredible amount of variations one can achieve using these materials and I always feel like the “mad scientist” when creating with them!!

So, I’m taking a day (well approximately 5 to 6 hours) on August 8th (don’t worry if you can’t be there for the Live taping, you can watch any time it’s convenient for you) and going to share all I know about these materials and how they react, how to get different reactions and even introduce other materials they react with.  Not only will you learn all about the products (so that you become an expert “reactor”) but you will also be learning 3 of my most popular finishes.  YES, 3 of my favorite and amazing finishes will be added to your portfolio and wow all your customers.

Now, this is a fabulous deal!  Stay at home and watch all this good stuff going on, ask questions during the process and have a private room that you will have access to for continued support!!

These finishes are totally “drool” worthy and I’m sure with all your new Rust & Patina knowledge, you will create many new “drool” worthy finishes on your own!

Make sure to sign up soon for this workshop by July 20th to save $30!!  Early Bird Special is $107 after July 20th class fee will be $137……

This workshop will provide all the knowledge you need to become your own “mad scientist” and understand how the products react, the different variations of the reactions and how to control them as much as possible (some of it just happens)!!

Looking forward to sharing my knowledge with all of you so that you can have as much fun as I do with all of these materials by Modern Masters – Metal Effects.

Also, one lucky student will receive a Rust Kit (16oz bottles)  that includes Iron Paint, Rust Activator, Primer and PermaCoat, valued at over $80!!  WooHoo, baby, that’s good stuff!!
 

Multi-Medium Canvas Art

I personally have a ton of stretched canvas (new ones still in the plastic). You just never know when you might need one.  And who can pass up a fabulous sale on them, you know what I mean, Hobby Lobby, Michael’s or Aaron Brothers – they just have to tempt us!!!

So, I’m sure like many others I have a pile of unused canvas just laying around and occasionally I find some time to play.  This particular one had been started once before and never finished.  But, I had an inspiration that I thought would look awesome.

The first layer on this canvas was my Texture Medium troweled on thin and then I used the Tiger Roller.  I rolled through the wet material creating three passes.  I allowed the Texture Medium to dry and then sanded down the high points.  At this point, I’m really not sure what the “inspo” was, but it was painted in a Coral color… Hmmm, not sure why and couldn’t remember that particular inspo, so I went with the new inspiration that was rolling through my head!!!

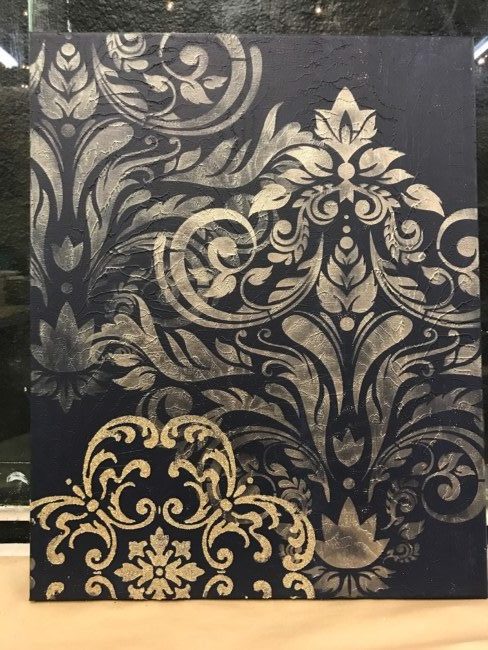
I grabbed some paint and stencils, then decided to share my idea with all my Facebook Peeps and turned on FB Live!  Why not??  I think it’s always more fun painting with friends than by yourself.  With the camera rolling, I shared what I had done and was starting to work on.  The canvas was repainted with General Finishes Milk Paint Coastal Blue (I love this Navy color) and then I used the stunning new stencil La Provence and stenciled it with Modern Masters Metallic Paint Warm Silver and Champagne and created a layered look.  Once the two repeats were completed with the La Provence stencil, it was a hard decision to either stop or add one more element… I couldn’t help myself, so I added another layer.

I had to add the Hampton Medallion stencil embossed with Glass Bead Gel mixed with Glitter. So yummy!!

This beautiful painting has it all, texture, metallic, stencils, glitter and Glass Beads!!!  One beautiful piece of ART!
A canvas can be a place to create fabulous art or even a place to experiment with techniques, products, and styles.

Grab a canvas and get exploring!! Let the Artist in YOU come alive!!

Blessings,

Jenn

Modern Masters – Glazes

There are many glazes on the market these days, but not all are created equal.  Some have way more open-time (which is the time you have to work with the glaze before it dries) than others and creates what I like to call a “happy glazing day”!!!
I’m going to go into some depth about the Modern Masters Glazes and the preparation to make a “happy glazing day” for you!!!

First, it’s not all about the glazes (but they really do make a big difference), your surface prep is also very important.  To allow the glazes to work at their maximum capability, you need to have a “sealed” surface to work on.  This means that the paint you want to apply the glaze over needs to be at least a eggshell sheen or higher (eggshell is a sheen of paint – not a color).  So I like to work over paints that are Eggshell and Satin in sheen.  It is also helpful if the paint you are working over has had some time to dry/cure.  This means that the longer the paint dries the more time it’s had to cure and get hard, which then will not soften as you apply a wet glaze over the top.  The best case scenario is to paint the surface and allow it to totally cure (which could take up to 30 days), not that this isn’t realistic in the painting world……who has time to allow paint to dry for 30 days!  LOL!  At least give it some time to dry, maybe at least a day or two and your glazing will work much better.
So now you have a painted surface (Eggshell or Satin finish sheen) and you have allowed it to dry for a day or so.  We can now go onto the glazes and how they work.

Let’s talk about the Modern Masters Furniture & Cabinetry Glaze first.  This glaze is thinner, reminds me of an oil glaze but it’s not oil. It’s a fabulous water-based glaze!  You can mix this glaze with Colorants (like Universal Tints – Modern Masters Colorants – etc) or just about any paint.  Which provides you with an unlimited amount of colors you can create to glaze with.  If I’m mixing up a color with my Modern Masters Colorants – my basic recipe is 1 cup of Glaze to 3 tablespoons of colorant.  I love the depth that this value gives, but please feel free to adjust based on your needs. If you need something more sheer, try 2 tablespoons of colorant.  If you need it more rich and deeper, then you can add more colorant…..but do remember that the more colorant you add the faster the glaze can dry.  Now, most of the time when doing furniture or cabinetry the surface space is smaller so usually, this is not an issue (just food for thought)!

Modern Master Furniture & Cabinetry Glaze

Mixing the Furniture & Cabinetry Glaze with Paint:
Now you can pick just about any paint or color and mix yourself up a batch of glaze (always test a small amount to make sure the paint is blending together well and that it is a water based paint).  My basic recipe for this glaze is 1 cup of glaze to 1/4 cup of paint. You can also mix within the range of 5 parts glaze to 1 part paint and as high as 3 parts glaze to 1 part paint.  Now remember again, the more paint the faster it will dry.

If you haven’t done much glazing before, I would recommend a test sample board to get used to the mixes you have created and your techniques.

Now, let’s move onto the Modern Masters Wall Glaze!!  This product is much thicker and was designed to be applied vertically for use on walls. It won’t sag or drip and holds the tooling that you create well.  This glaze can also be mixed the same as listed above for the Furniture & Cabinetry Glaze, but you do want to try and keep your mixtures on the lower side of adding color, which could create an issue on the larger surface area that you will be dealing with.

Modern Masters Wall Glaze

“Open-time” or “Working Time” are words that we use to describe how much time you have to work/manipulate the glazes before they will start to set up and you don’t want to disturb them anymore.  This is a big deal as your surface area gets larger and Modern Masters Glazes have some of the best working time there is.  If you are on a well-sealed surface, you should have about 20-30 minutes of Open-Time – which is great!

I hope that you will check our these fabulous glazes and give them a try! This will make your glazing projects much easier and give you amazing results!

A Year Long Transformation!!!

I always have high hopes when I find a great piece of furniture to transform!  LOL  But, then reality sets in and I discover that my work schedule is just so busy, that I don’t have much time to paint!

I found this piece (guess is was a China hutch at one point) at least a year ago – thought it would be wonderful for my office and I would use it as a book shelf.  The current book shelf I have is falling apart and needs to be replaced!!!

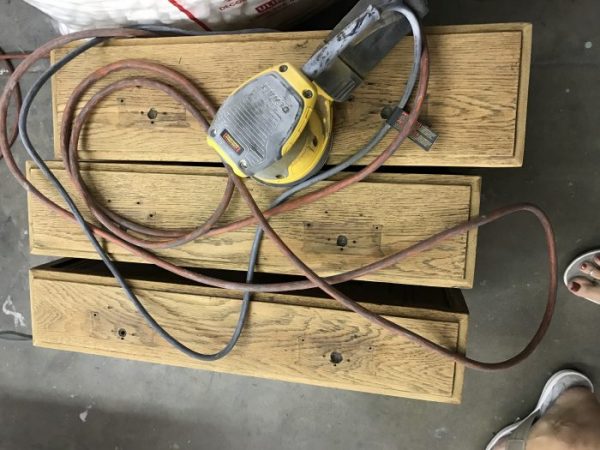
Whatever paint that had been used on it was just scratching off – so I decided to take it back down to the wood……You know I LOVE to sand – NOT!!!

By the way – those wonder little dollies that the legs are resting on can be found at Harbor Freight – they come in two different styles and I own both!!!

Dollies for furniture

Now, the time that had already passed from the date I brought this to the shop, to the time I started to sand it was over a month or so…….so much for getting anything done fast!

Hutch section

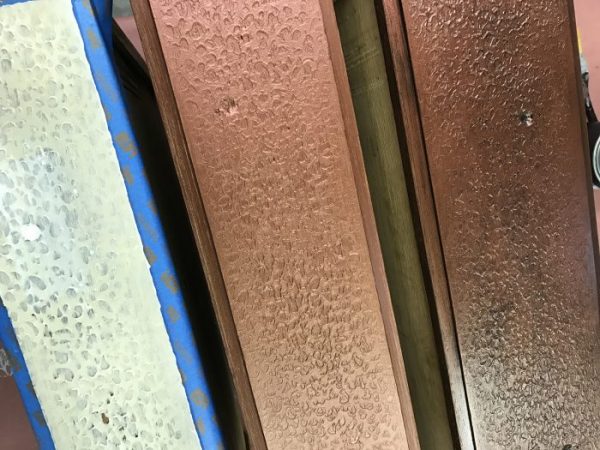
Time to start at least the drawers.  I created my Hammered Metal finish using the Texture Medium and Ostrich Roller.  Tape off the drawer fronts to isolate the area, then trowel or brush on the Texture Medium.  While the Texture Medium is still wet, roll the Ostrich roller through it several times (I like the messy look).  Just allow the Texture Medium to dry and then sand down any of the peaks or rough areas.

Texture Medium & Ostrich Roller
Products used

Once the drawers were dry and sanded – then I painted two coats of the Modern Masters Antique Copper. After the Paint was dry, then I added a layer of glaze to create depth – Modern Masters Wall glaze and Tobacco Brown Colorant.

Textured, Painted and Glazed
Drawers Finished

All the drawers are finished – now it’s time to tackle the rest of this piece……LOL

Adding some color!

Finally adding some color to the base section – I started this in September of 2016 and I hate to admit that it’s April of 2017 and I’m still working on the same piece of furniture!!!  Talk about being a little slow…..

This was painted with DIY Paint Seaglass by Debi’s Design Diary – I love their Chalky paints.  Easy to use and great coverage.

Hammered Metal finish with Embossed Stencil

The ends of the cabinet were created with the same technique as the drawer fronts and I just added the Hampton Medallion stencil embossed with the Texture Medium (TM is wonderful for embossing stencils)!!!

Top of cabinet

I created a “Wet Blending” technique using both the Seaglass and Mermaid Tail DIY Paints and then stenciled with Bronze Foil!

Bottom section completed!

Bottom section of this cabinet finally completed – I think it’s at least June at this point!!!

I used my Foil Adhesive and Bronze Foil to transform the hardware!!!  This was soooo fast and easy!  Just apply one layer of Foil Adhesive and allow to dry to a firm tack and then transfer foil – I didn’t try for 100% transfer, I liked a little of the original color coming through.  Top coat to protect!

The massive hutch finally started – one coat of primer done!!!  This piece is really heavy!

It’s sometime in July and the hutch is moving along.  The back section of each “cubby” was created with the Hammered Metal finish – Texture Medium and Ostrich Roller – apply the first layer of paint.  Modern Masters Antique Copper – applied two coats!

Just about finished with the painting!!!  First coat of DIY Paint, Seaglass – love this stuff!!!

The complete hutch/cabinet – yes, I really do finish things!  I have discovered that if there is NO deadline for something, it takes me a year to do it……..that’s really not funny but it is what it is!

For complete details on the most of the steps to this project, watch the videos posted below – I did tape most of the process!!!

Hope you enjoy watching the process and my goal for my next project is that it only takes 6 months and not a complete year!!!  Next project in line is my dinning room table – hoping to start in October!!!  Let’s see how that works out 🙂

Blessings to all,

Jenn


Hometalk LIVE – Coffee Table makeover!!!

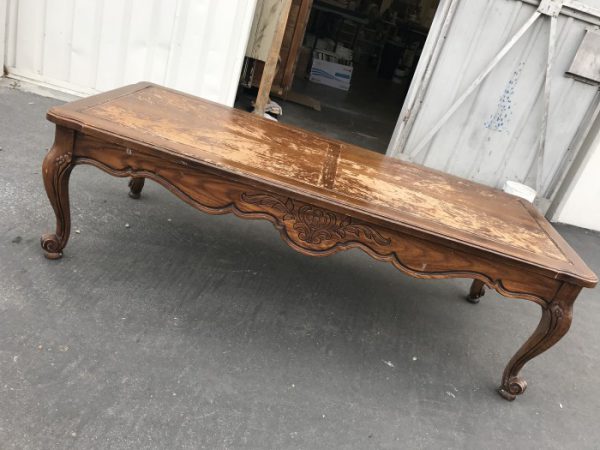
Yard Sale find -  score!!!
Yard Sale find – $10 score!!!

I hope you had the chance to join or watch me on Hometalk Live – if not, make sure to watch it on Facebook at Hometalk Live with Jennifer 🙂  This was a ton of fun and I’m looking forward to my next project in December!!!  WOOHOO 🙂

As I always start my projects, this table went out the back door for a good sanding and cleaning – the previous owner had a “love-affair” with Pledge!  Many layer and layers of build-up needed to come off. Once the sanding was complete, I cleaned the table with a mixture of Vinegar and water 50/50 – this helps to remove dirt and grease.  Even with all my efforts – I still felt there was some of the Pledge build-up left and I was done with sanding (if you know what I mean)!!!  So to insure that all my efforts would stick – I decided to prime the entire piece with XIM Primer for adhesion (XIM has lot’s of different primers – make sure to find the one you need for your project).

Taping off center panel and priming

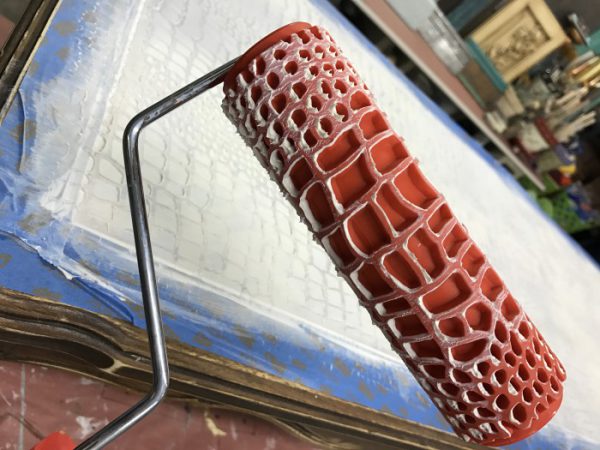
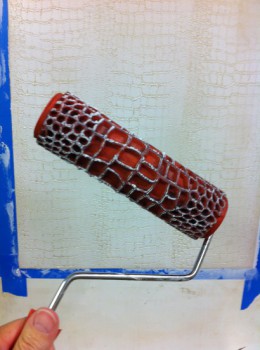
I wanted to get the center panel done first, so I taped off at the recessed grove in the table and primed with XIM primer.  Allowed this to dry and then started on the Crocodile pattern.  Using my brand ArtsSyVille Embellishments Texture Medium – I troweled on a thin (1/16″ to 1/8″ thickness) layer of Texture Medium using my Japanese Trowel.  This takes a little practice using a trowel – but check out my YouTube Video’s for more instruction on this technique.  I troweled the Texture Medium over the entire center panel and while it was wet, I rolled the Crocodile Roller through the wet material.  As you can see the top had a stripe of wood that went down the middle of the panel – this was my guide.  I rolled through the center following the wood stripe and then rolled to the right and left – centering the pattern on the panel.

Crocodile Roller through wet Texture Medium
Crocodile Roller
Crocodile Roller

After rolling the Crocodile Roller through the wet AE Texture Medium – I removed the tape and allow the Texture Medium to dry completely.  While I was waiting for that to dry, I finished priming the rest of the table.  Once the Texture Medium is dry – you will need to sand down the “peaks” that the roller creates as it lifts up the material a little – I just sand by hand, using 150/220 grit sandpaper and sand by feel, not sight.  You just want to smooth out the rough areas – don’t element the pattern you have created.  Once it was sanded, I dusted and cleanup up the top to get it ready for it’s first layer of paint!!!

Table painted in Smoke and Old 57

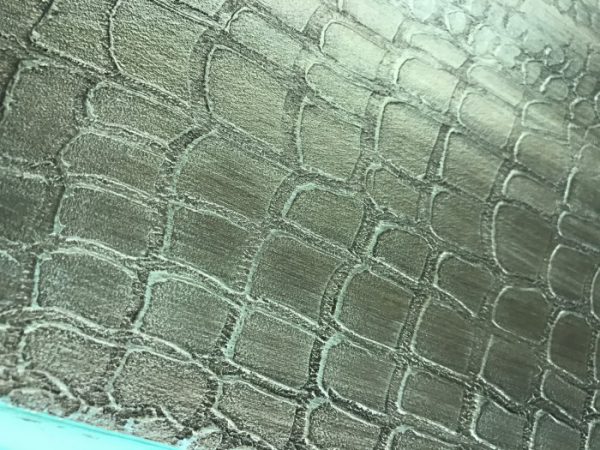
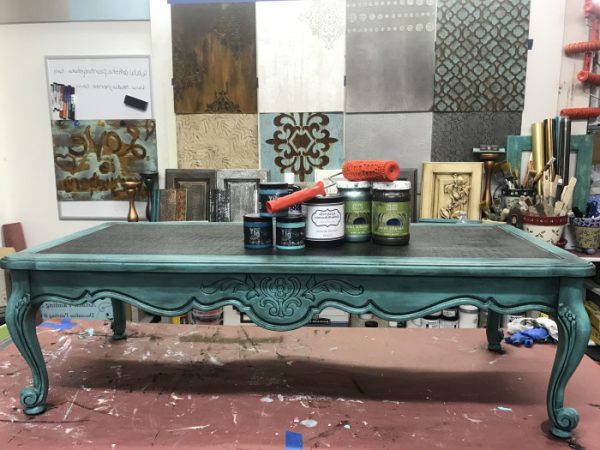
The center panel with the Crocodile roller was painted in the Modern Masters Metallic Smoke color – this paint color covers very well and I actually did get full coverage with one coat.  When you watch the video, you will notice that the metallic paints show very distinctive brush/roller marks – this is due to the metallic particles in the paint.  As you brush or roll in one direction, it’s laying the particles down in that direction, which shows the brush marks.  Best to brush in one direction to element as many brush marks as possible – I wasn’t worried with this project, I knew I was layering over it and everything else I was doing would hide those marks!!!  (But, I do suggest practicing with metallic paints – they are a little tricky).  The rest of the table was painted in Debi’s Design Diary DIY Paints Old 57 (one of my favorite colors) – I applied two coats for complete coverage, allowing the first coat to completely dry before applying the second coat.  Once all the base painting was completed – it was time for some Dry Brushing 🙂

Dry brushing Teal over Smoke
Dry brushing Seaglass over Old 57

I love the Dry Brushing technique – this adds depth and dimension while highlighting the texture.  To create a dry brush technique – first, you want to start with a Filbert style stencil brush or an older stiff Chip brush (it’s best with a stiffer bristle).  Pour a little paint onto a palette (or foam plate) and pick up a little paint on the bristles, work the paint into the brush and then off-load all the paint on a paper towel (yes, this seems crazy – but it’s the only way to create a true Dry Brush).  The dryer the better, this puts you in control of the paint and so you can place it where you want. With a light touch, brush over the area you want to highlight – on the top, I highlighted all the Crocodile pattern, bringing out the edges and creating depth – this was done with Modern Masters Metallic Teal (such a beautiful combination).  Then as I went onto the Old 57 on the rest of the table I used the SeaGlass by DIY Paints – I was looking to create a little more interest and highlight all the detail – this will be subtle when completed, but adds that extra depth that you don’t see all the time!

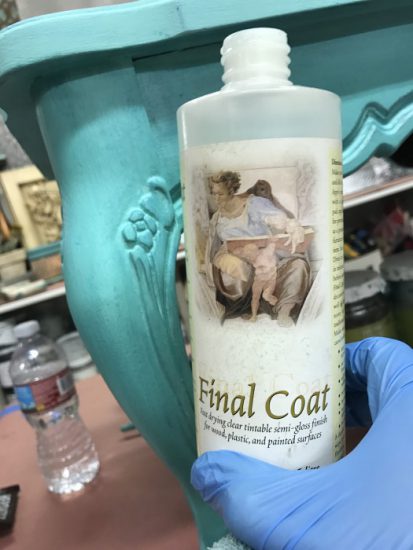
Sealing with Final Coat

So, with my choice to use the DIY Chalky Paints – I did add another step for myself.  Which meant I had to seal the paint before glazing – Chalky paints are way too porous to glaze directly over and have any control of your glaze.  This is one of my FAV sealers and I love that you just wipe it on – Final Coat the Wipe on Varnish.  Just tip the bottle onto a staining pad – just allow a little product to come out and wipe onto the surface – it’s meant to go on paper thin and it dries within minutes!!!  Allowing you to go to the next step fast 🙂  I only wiped on one layer, which I knew would give me some control but I also wanted the glaze to grab a little and create a very distressed/aged look.  Once the Final Coat was dry – it was time to glaze this baby!!!

Black Glazed applied over Old 57/Seaglass

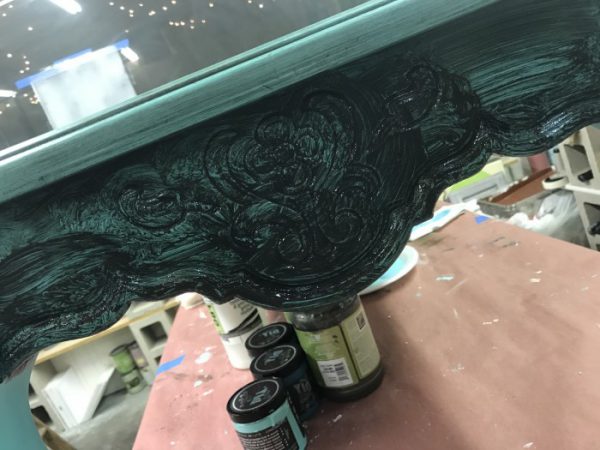
I did start with the center panel over the Metallic Smoke – which I knew would glaze easy.  I brushed on the American Paint Company Black glaze using a Chip Brush and then wiped off the excess, just leaving a little in the recessed ares of the Crocodile texture – this creates so much depth and dimension to the top and brings out the pattern!  I wiped most of the glaze off – still wanting to see the Teal that was dry brushed on 🙂  Then I started the top edge and worked my way down all around the table – it’s pretty scary brushing on a Black Glaze!  I worked in one section at a time, knowing that I only had one coat of the Final Coat and it was just giving me a little working time, but also still grabbing the glaze fast (but that was the look I was going for – Distressed/Aged).  I brushed on the glaze using the chip brush and wiped off the excess with Cheesecloth (I love using this stuff) – I left a lot of glaze behind, left more in the edges and corners to enhance the style I was going for.

If you want a cleaner more refined look with the glaze, make sure to use a least two layers of the Final Coat or a brush on varnish, which will give you better coverage and a more sealed surface. This will allow you to control the glaze better and you can almost pull all of the glaze back off, just leaving it where you want it.  There are so many looks that can be created with glaze – I think that’s why I love it so much – lot’s options and looks!!!

I waited for the entire piece to dry completely and with glaze this can be overnight.  I applied the America Paint Company Hard Coat for a durable finish (remember I have a household full of boys most of the time – we need durable)!!!

Make sure to check out my Fauxy Rollers page on Facebook – a great place to be inspired!!!

Completed Table
Completed Table


nov-22-149

Products Used:

XIM Primer

ArtsSyVille Embellishments Texture Medium

Decorative Pattern Roller – Crocodile

Modern Masters Metallic Paints – Smoke & Teal (you will have to call the studio for these products – not on website at this time)

Debi’s Design Diary DIY Paints – Old 57 & Seaglass

American Paint Company – Black Glaze & Hard Coat

Final Coat Wipe on Varnish – Semi-gloss

You can purchase all the materials and supplies through Artistic Painting Studio – If you don’t find something online, please feel free to call the studio at 714-386-3243.

Blessings and Happy Painting!!!

Jenn


Pattern Rollers – Another Obsession

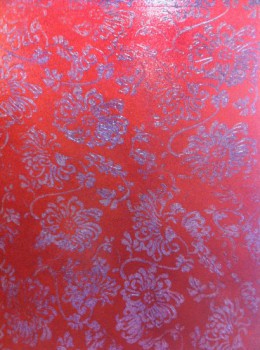
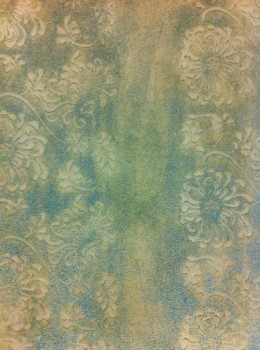
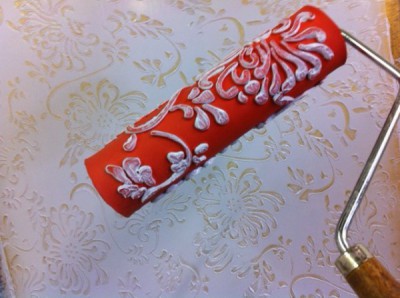
Chrysanthemum Roller

Pattern rollers have been around for a long time and I played with them a few years back, but never embraced  their possibilities. Over the last year or so, I started looking for these rollers once again and have been playing around with the different textures that I can create with and how FUN they are to incorporate in my decorative painting.

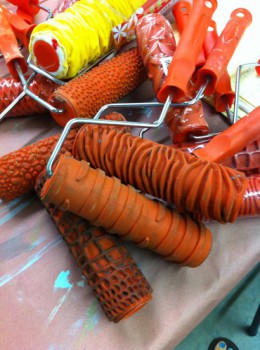
Roller collection
Roller collection

I have been posting on Facebook over the past several months, showing the different roller patterns/textures I have found and have been using in my decorative painting.   My friends/followers have been asking many questions about using them in decorative painting and I thought it would be fun to address these concerns/questions/issues in a blog post…….hopefully I answer everyone’s questions – but if not, please feel free to post questions here!!!

Python - Diamonds - Crocodile and more
Python – Diamonds – Crocodile and more

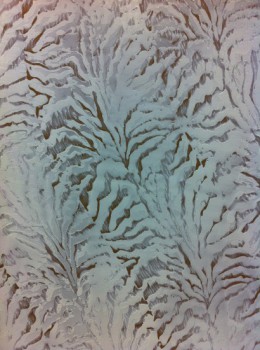
To start with – there are many different patterns and textured rollers available to work with and I have found that I can just about roller through any texture material (all the products I use are made by Proceed by Golden or Modern Masters).  The texture materials that are a little more heavy bodied, like Smooth Absorbent Texture (Proceed by Golden) is a little easier to work with than a “slick” texture like Smooth Translucent Texture…….the roller can possibly slide, instead of roll through these textures.  But you can always mix the two of these products together and make a “new” wonderful texture material to play with (that’s a hint – love them mixed together – 50/50)!!

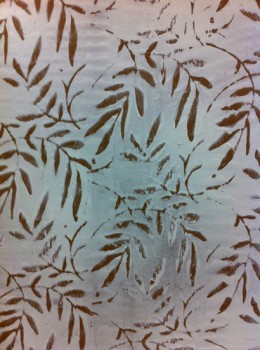
Artsy Leaf Pattern
Artsy Leaf Pattern
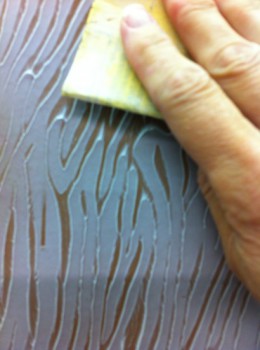
Tiger Skin roller
Tiger Skin roller

But, with a little practice and playing around – you can work with any texture material  and may discover you end up with a favorite texture or two!!!

When working in different texture materials – I use my Japanese trowel to apply the texture to the surface, working in sections 2 to 3 feet wide and ceiling to floor if possible (depending on the open-time of the material you are working with).  Once the texture has been applied to the surface, it helps to “wet” the roller in a bucket of water and then roll through the texture – you can clean the roller off in the water bucket to prevent the roller from getting loaded with too much material (I even learned this trick recently and love it).

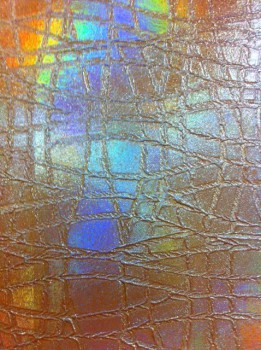
Crocodile Skin Roller

There are many different patterns to choose from (www.artisticpaintingstudio.com/shop/tools/rollers/) – the patterns can be rolled vertically – horizontally – create stripes or random application – you are the artistic creator with these rollers and there really are not any rules!

One question I have been asked over and over:  How do you handle corners, crown molding and baseboards?  There are several options to handle all these areas.

1st option:  There is a tool that has a rubber tip and you can uses this tool to hand carve the pattern into the areas that the roller is not reaching or continuing to print.

Carving pattern tool

2nd option:  Purchase two rollers – cut one off the roller and use this as a stamp to print the pattern into the hard to reach areas.

3rd option:  Be creative in the layout of your design – you could always frame a wall, leaving a border all around the pattern roller – creating more interest to the design.

Chrysanthemum Roller Random application

You will find that the rollers will “peak” up the edges of the material as you roll through it – which will require some sanding once it is dry.  Sand the surface using 150 to 250  grit sandpaper to remove the “high pecks” if necessary.  Complete the finish using your creative juices – using foils, glass beads, glaze, optional plasters, etc.

Sanding high peaks
Sanding high peaks

So far I have discussed all negative options for working with these rollers but you can also create a positive effect by rolling into paint and rolling the design onto a painted wall/surface.

I love working with them on furniture – drawer fronts are wonderful to work on and no issues of corners/etc.

From floral to animal skins – there are many pattern options to work with and the possibilities are endless…..I have been playing for many months and feel I have not even scratched the surface of options.  You can order these on line for Art Rollers – they range in price from $12.95 to $20.95 for the Rubber style rollers and $49.95 for the Shamie style rollers.

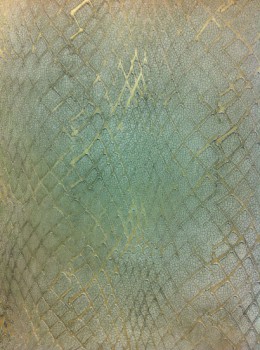
Snake Skin roller
Snake Skin roller
Cascade Roller
Cascade Roller
Chrysanthemum Roller

Durability and life of a pattern roller is another question that I have been asked – these are all rubber material rollers and all materials that I have worked with to date and washed off the surface with no issues and as long as you take care of the roller – they should last a long time!  The Shamie style rollers have also held up very well – I rinse well and then use a little soap to clean out residue left behind.

I have most of the rollers available on my online store – but some of them have just come in and have not been loaded on the site – if there is a roller you’re looking for and can’t find – please just call the studio at 714-386-3243 and I will help you out.  I also teach many classes that incorporate using these rollers – so you can get hands on experience working with different rollers and different textures.

Blessing to all, Jenn