Free shipping on orders over $100! **After discounts have been applied & Continental US only

decorative rollers

My Passion for Decorative Art Rollers

My Love and the popularity of Decorative Rollers continues to grow as more people discover these wonderful tools.  So, I’m here once again to share more of my Tips & Tricks for using these rollers and making your projects easy and fun!

My collection continues to grow with over 50 different patterns to choose from, so your first task is trying to figure out which pattern you want to play with.  For some people this is the hardest thing, choosing which roller to start with!

If you are wanting to learn different techniques on how to use your rollers, you will definitely want to check out my YouTube Channel. I have tons of tutorials showing you how to use your new roller.

Check out my YouTube Channel Here

One of the easiest techniques for using the rollers is a “negative” technique.  Let me try and explain what I mean… These rollers are designed to make an “impression” into wet material.  Like in my videos, I demonstrate applying Texture Medium, paint or glaze for you to roll into/through.  This creates a negative impression of the pattern into the wet material.  You can see this in action on my YouTube Channel!

Glaze is one of the easiest materials to work with.  This medium stays wet for a long time and will allow you to apply the glaze and have plenty of time to roll through while it’s wet.  I actually like to let the glaze “set-up” for a few minutes after applying to the surface. Otherwise, your roller may “slide” in the wet glaze.  Also, make sure that your roller head is spinning freely on the handle before you use it.  If it’s not “lube” the bar with a little Pam Cooking Spray.  This stuff works great!

Paint is another medium that you can roll through. I really love using DIY Paint!  Application is the same as glaze, but you will not have as much “working time” because paint dries faster.  If you are using paint and the surface area is larger, you can add some clear glaze to your paint to help it stay wet longer.

My favorite medium to roll through is my Texture Medium by ArtsSyVille Embellishments.  I have worked very hard on creating a texture medium that is easy to roll through and this stuff is AMAZING!  One thing that is really important when rolling through an applied texture, is to keep the application “thin”.  I always say to my students ‘Thin wins’!  If you have applied the texture too thick on the surface it just clogs up the roller and you will have to wash it more often…. And that’s not any fun!  Also, having more than one roller for a larger project is a good idea 🙂

For more information on these amazing rollers, you will definitely have to visit my YouTube Channel.  If You don’t have any plans tonight, just grab some popcorn and watch a video or two 🙂 You will love learning these amazing techniques.

I sure hope that you will give the Decorative Rollers a try and please let me know if there is any additional information that you need before you get ROLLIN’!
 

Rollers & Fabric

If you haven’t figured it out yet, this girl is in LOVE with rollers!! I mean, the applications just seem to be endless… Having so many options, my creative juices start flowing and my head starts spinning!

One of my favorite ways to use my Stamping Rollers lately is to “Stamp” fabric. There are so many different types of fabric to use and so many different DIY projects you can create!  I’m just going to touch on a few ideas to inspire you today, but I’m sure there will be even more blog posts to come in the future on this subject.

Recently I was playing around with some burlap and so many ideas and uses for painted burlap came to mind.

I was playing around on a Facebook Live the other day and I was trying to see if it was easier to: paint the burlap first before rolling a pattern or if it would work painting over the rolled pattern.  Well… GUESS WHAT!! Either way worked just as well… Yay!!

But, isn’t it nice to know that after you rolled a pattern on the fabric and you decided that you wished you had painted a different color for the background that all is not lost and you can paint right over what you have already done!

Okay… Now onto the project 🙂

Just grab your Stamping Roller handle, sponge/foam roller and your favorite roller pattern and let’s get started.

Using a “serving tray” as my paint tray, I cover it with Press-n-seal (that’s so I don’t have to clean it later) and pour out my favorite color of paint. I have to say I love working with my DIY Paints and I used Old 57 and Hey Sailor on this project.

All paints have different consistencies and if the one you have chosen, like the DIY Paints, is a little thicker, then you may want to add a little bit of water to the paint before loading it on the foam roller. Thinner paints seem to soak into the foam much easier.

Insert the foam roller into the small holes that are closest to the handle and roll it into the paint. Make sure that the roller is completely covered with paint. This way it will apply paint to all sections of the pattern roller where needed.

Once the foam roller is loaded with your favorite paint, then you will insert the pattern roller of your choice into the holes on the end of the U-shaped handle. You will now want to get out a piece of practice paper and roll onto the surface.  This will load the paint onto the patterned roller and make sure everything is “rolling” correctly!

From here, I just laid out the Burlap and rolled from one end to the other, skipping about an inch in between my passes.

It takes more time to load the roller than it does to paint your project most of the time.  You can have your fabric project painted so quickly, it’s crazy!

I am thinking that this project will make a nice rustic table runner and who knows what else I will decide to do with the rest of this burlap!

I would love to know what ideas you have going on in your head!  Please share your ideas and uses for Painted Burlap with me!

Check out the Facebook Live I did here:

Products Used:

Stamping Rollers

DIY Paint

Burlap (affiliate link, no extra cost to you 🙂 )


Getting Funky with some Painted Jeans

So call me a little Funky, a throwback to the 70’s or whatever… BUT I love my painted Jeans!

Talk about fun!!  They are fun to wear and even more fun to paint!!  So grab yourself some jeans and if you don’t have any to paint, head to your favorite Good Will (or your favorite thrift store) store to find a pair at a great price!  This is even a great idea for some practice and playing around.  I picked up several pairs for only $5 to $7 each!!


I love using my rollers to paint on the jeans (I’m currently looking for a denim jacket for another project) and both of the rollers styles can be used.  But for the most consistent application, I like to use the Stamping Rollers.

When using the rollers for painting on fabric there are a few things that you need to know first.  Many different paints can be used, but I have found that fabric paints do work the best.  The main reason is that you are only rolling the paint over the fabric and not working it into the fibers so we need something that is meant for fabric painting.

Even spray a light mist of water over the area you are going to paint – this will help the paint to soak into the fabric.  Make sure to allow the paint to dry for the recommended time and then heat set.  Heat setting can be done several ways: you can bake them in an oven on low, throw them in the dryer for about 30 minutes on high heat or iron using a pressing cloth.  All these methods will work for heat setting the paint.

I have used Plaid Fabric Paint and have also used DIY Paints, General Finishes Milk Paint with adding a Fabric Medium to both of them… BUT the Fabric Paint did wash the best.

So get out your rollers and a pair of those old jeans hanging in your closet and make some wearable art!!

Come on girls, get funky with me!!!

Multi-Medium Canvas Art

I personally have a ton of stretched canvas (new ones still in the plastic). You just never know when you might need one.  And who can pass up a fabulous sale on them, you know what I mean, Hobby Lobby, Michael’s or Aaron Brothers – they just have to tempt us!!!

So, I’m sure like many others I have a pile of unused canvas just laying around and occasionally I find some time to play.  This particular one had been started once before and never finished.  But, I had an inspiration that I thought would look awesome.

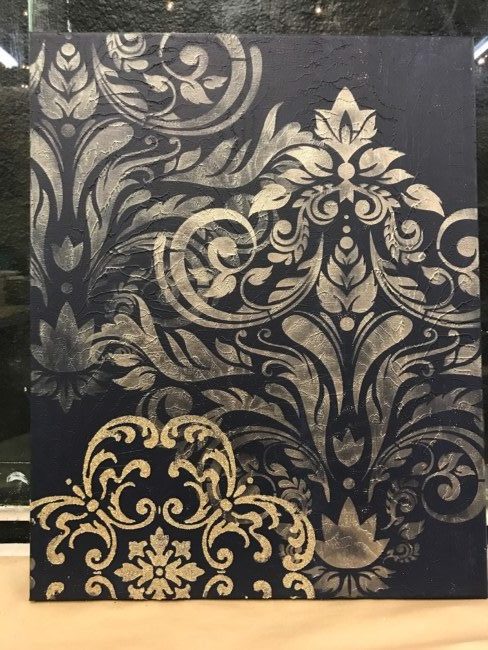
The first layer on this canvas was my Texture Medium troweled on thin and then I used the Tiger Roller.  I rolled through the wet material creating three passes.  I allowed the Texture Medium to dry and then sanded down the high points.  At this point, I’m really not sure what the “inspo” was, but it was painted in a Coral color… Hmmm, not sure why and couldn’t remember that particular inspo, so I went with the new inspiration that was rolling through my head!!!

I grabbed some paint and stencils, then decided to share my idea with all my Facebook Peeps and turned on FB Live!  Why not??  I think it’s always more fun painting with friends than by yourself.  With the camera rolling, I shared what I had done and was starting to work on.  The canvas was repainted with General Finishes Milk Paint Coastal Blue (I love this Navy color) and then I used the stunning new stencil La Provence and stenciled it with Modern Masters Metallic Paint Warm Silver and Champagne and created a layered look.  Once the two repeats were completed with the La Provence stencil, it was a hard decision to either stop or add one more element… I couldn’t help myself, so I added another layer.

I had to add the Hampton Medallion stencil embossed with Glass Bead Gel mixed with Glitter. So yummy!!

This beautiful painting has it all, texture, metallic, stencils, glitter and Glass Beads!!!  One beautiful piece of ART!

A canvas can be a place to create fabulous art or even a place to experiment with techniques, products, and styles.

Grab a canvas and get exploring!! Let the Artist in YOU come alive!!

Blessings,

Jenn

Ins & Outs of Debi’s Design Diary DIY Paint

If you know me at all, you know that I LOVE DIY Paint!!

Let me tell you why I love this paint so much and how to use it.

First off, it is all natural and that makes me a happy person considering I’m in it a lot and sometimes, it’s all over me! LOL! Also, this product only has 9 ingredients and has absolutely NO VOCs!!

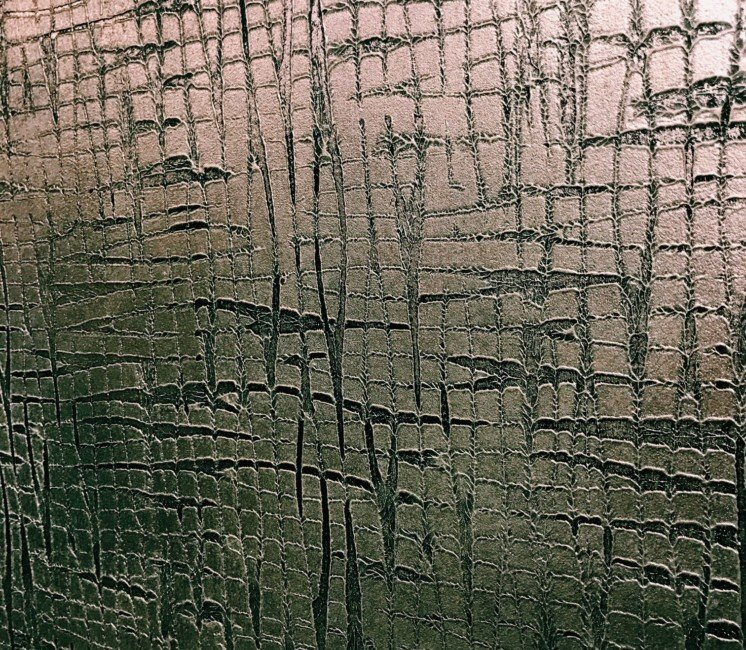
Second, it’s a little thicker than most paints on the market and holds its form. This is called tooling, meaning it will hold your brush stroke or for me, it holds the roller pattern. I love that I can brush on one generous coat and roll my patterned rollers through the paint and the pattern stays without self-leveling. It’s also thicker than most paints so that I gain a little texture and depth from the roller patterns. This is great for your wax or glazes to set down in and add even more depth to your project!

Third, the colors! I can’t say enough about the color selection!! I’m in love with this palette and they mix so well together to make new colors I want! Yes, I know that I have been a little stuck on the Teal palette, but how can you go wrong with Mermaid Tail, Seaglass and Old 57? They are just fabulous 🙂

So, let’s move on to some techniques you can do with these paints 🙂

Creating a “smooth” finish can be achieved with the following methods:

Option #1 – Wet your brush first with water, but not dripping. This will allow your paint to be a little diluted and thinned out. After several brush strokes, dip you brush into water again and brush back over that area you just painted.

Option #2 – Pour some paint into a separate container and add a small amount of water and mix thoroughly until you have created a thinner consistency. Make sure it is not too watery. The DIY Paint is highly pigmented and this will not affect the color with the little amount of water added.

Use either technique for applying your paint and apply 2 to 3 coats of paint, allowing each coat to dry completely between layers. Also, you will need to sand with a fine sandpaper or a paper bag between coats to smooth out any unwanted texture or brush strokes. You will need to finish with either DIY Wax or Big Top to protect the paint.

Creating a “textured” finish can be achieved with the following methods:

I love how thick DIY Paint is straight out of the can and how easily it can build texture on any surface. Just apply paint directly to the surface from the can, using less if any water at all. Apply your strokes in one direction or in an “X” pattern.

When the first coat of paint has dried completely, you can apply a second coat using the same color or a different color. Paint on the second coat using the same brush strokes, creating even more texture.

For some extreme texture, get out your putty knife and dig into the paint in places before the last coat has dried completely.  This will expose the colors underneath and create a very weathered worn look.  You can also use the putty knife to apply colors randomly by pouring some paint into another container and allowing it to sit out for a while and thicken up!

Again, you will want to finish off with either DIY Wax or Big Top.

The possibilities are endless!!  Let your creative spirit fly and make a masterpiece with these amazing paints!  You can check out the complete line on my website, in my studio or my second location in San Clemente, California, La Casa Verde de Granada!

Be Blessed and Paint!!


Let’s get FOILED

FOILS…

What the heck are they and why is everyone so excited about them?

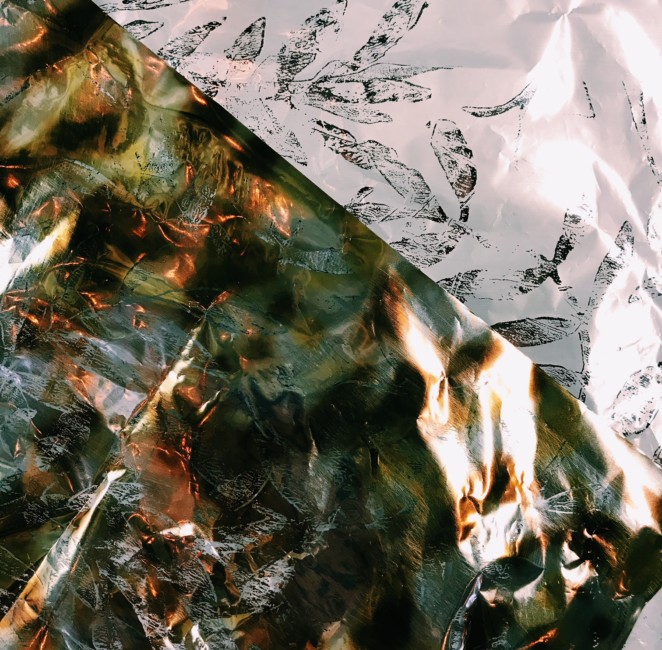
First, let me try and describe what foils are and how to use them.  Foils are a metallization on the back of plastic and create a bright and shiny surface.  The most brilliant metallics will always be Leafing, but Foils are not far off and much easier to work with or maybe I should say not as messy.

Foils come in soooo many different colors, patterns, and holograms, that you have a ton of options!

The process is also pretty simple. It is simply applying a Foil Adhesive, allowing it to tack up and then transferring your foil.  Okay, I will give you a little more details and step-by-step, but it really is that easy!!

First, you do need a Foil Adhesive for this process and I have a fabulous Foil Adhesive for you.  You need to apply the Foil Adhesive to your surface and allow it to dry to a firm tack.  You can brush or roll this onto your surface, but all your application marks can show through the foil.  Make sure to roll or brush in one direction to minimize your roller marks or brush marks.  Allow the Foil Adhesive to dry for at least an hour before trying to transfer the foil.  The Foil Adhesive that I sell does not dry beyond a firm tack, meaning it is sticky for life.

Once the Foil Adhesive has dried for at least an hour and is a firm tack, you will apply your foil over the surface.  You want to make sure that the shiny bright side is facing you when you apply it.  Use a terry rag or any soft rag and rub the foil into the adhesive surface. Don’t use your hands because they can leave marks.  Always peak underneath the foil and determine how much you want to transfer before removing the foil completely.  There is no standard or correct application, you can transfer as much or as little as you would like to see.  If rubbing with a terry rag is not transferring enough foil for your liking, then get out a scrub brush.  Make sure to scrub the surface up/down, do not scrub in a circular motion.  Again, the scrubber marks may show in your application, so make sure you are scrubbing up and down.  Once you have transferred as much foil as you desire you can remove the plastic.

Due to the fact that the foil adhesive never dries past a firm tack, you will want to apply a top coat not only to seal in the tack but also to protect the foil finish.  Foils are delicate and can scratch easily, so you want to make sure and protect them.  It’s best to make a sample board with a foil transfer and then section off areas to apply different top coat sheens and determine which one you like the best.  Anything in a top coat below Gloss will alter the sheen of the foils.  Sometimes we want to keep them bright and shiny and other times we want to dull the high sheen using a lower sheen top coat, like satin.

Grab yourself some foils and foils adhesive and just play!!  They are easy and fun to work with!!  Just go get creative and create something bright and shiny!!