So I’m sure that I’m not the only one that has these ideas that just come to me and then it’s finding the time to make them happen!!! I had been so inspired by all the fabulous pictures I have seen over the last month of everyone’s front porch all decorated with painted, glittered, carved pumpkins! I actually went to Michael’s and Hobby Lobby to find some plastic or paintable pumpkins – but by the time I was shopping (which was last Friday) there wasn’t much to pick from. So when I was grocery shopping, I picked up a couple more real pumpkins – I love the character of the real pumpkins – not perfect, leaning to one side – dents and all!!!
Well the clock was ticking to get these pumpkins painted – it is already October 18th and I not only wanted them for Thanksgiving, but also wanted them done before Halloween! So, I get the call late in the afternoon that my Honey is working overtime and the youngest has a meeting a school until 8pm……WOOHOO!!! Guess what – I get to paint my pumpkins 🙂
Oh, course I just couldn’t paint these all by myself – it would have been fun, but not as much fun as going Live on Facebook……this way I would have some friends to paint with. Now, I was also hoping that my idea was going to execute well – I really didn’t try this out first! LOL So I gathered my supplies and started to prepare one of the pumpkins to speed up the time on Live video and then had you all you join me.
This was a fun project and Thank Goodness – it really turned out awesome – just like I imagined!!! Whew – dodged that bullet – this could have been awful…..
So here is what I did – step by step – so if you have been dying to paint or Foil some pumpkins here are the instructions and it was pretty fast project (just needed to wait for things to dry and I actually used a blow dryer to speed up the process).

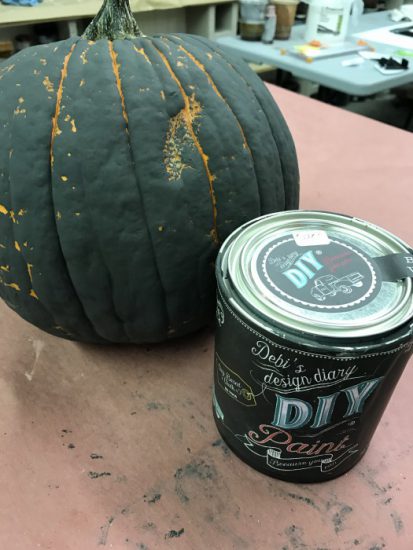
Start with some great “real” pumpkins from the pumpkin patch or Vons, like I did. I didn’t even wash them – just brushed off any dirt that I saw and started painting. I used Debi’s Design Diary DIY Paint – Black Velvet. Turn the pumpkin on the side and paint the bottom first – I blow dried the bottom so that I could stand the pumpkin upright and finish the painting. I used a 2″ paint brush and didn’t try to paint 100% coverage – allow some of the Orange pumpkin color to still show (it looks great)!

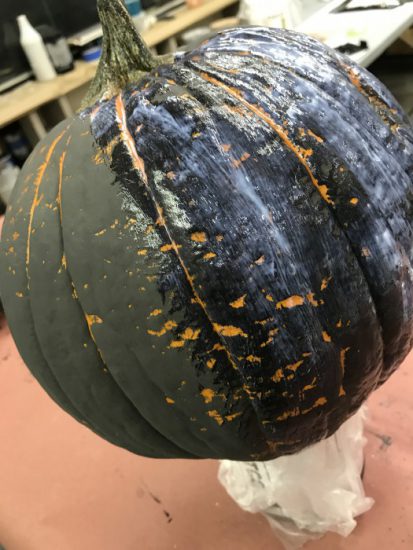
Once all the painting is done and dry – you will apply a layer of my APS Foil Adhesive. This stuff creates a prefect “tacking finish” for the foils to transfer to. When you apply the APS Foil Adhesive it looks milky white but will dry completely clear, shiny and tacky. Allow the APS Foil Adhesive to dry to a firm tack – this can take anywhere form 15 minutes to 1 hour depending on the humidity.


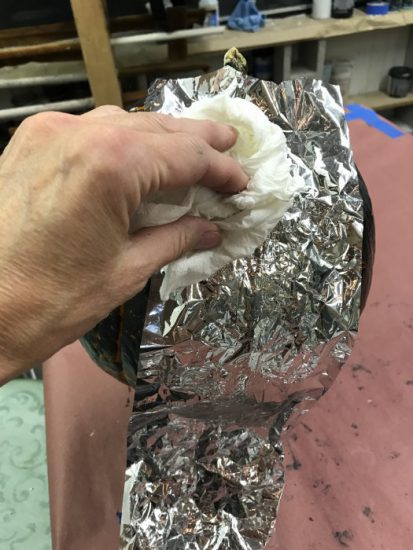
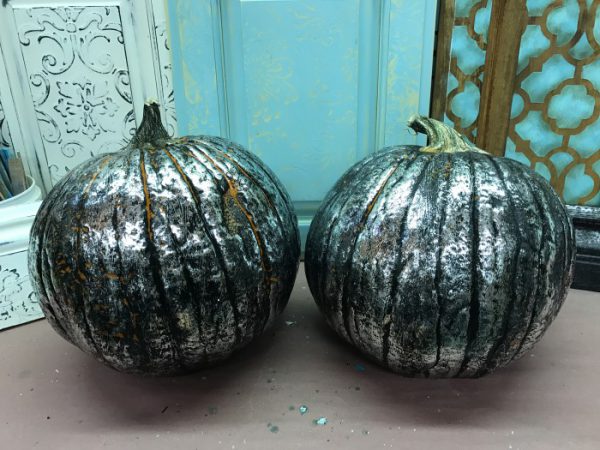
I used my Silver HS Foil – cut your foil into manageable pieces and I crinkled the foil first. Make sure to adhere the foil to the tacky surface with the “shiny” side up facing you. Foils are a metalization on the back of clear plastic – with a great foil adhesive and an easy release foil, they transfer to the tacky surface. Using your hand or a soft rag, rub the shiny side of the foil and transfer as much of the Silver foil as you would like. I left a lot of the Black showing (that was my personal favorite – but transfer as much as you like).


Once the foil is transferred – you can move to the next step if you have one. I decided I liked the pumpkins just as they are – I have some of the Orange showing, the Black is a matte finish because I used DIY Paints chalky paint and then the shiny Silver foil – I love all the contrast of the different textures. My pumpkins are still a little sticky because of the Foil Adhesive – but, these will be thrown out after the holidays – so I’m leaving them as is!!!
Happy Holidays to all of you – hope you have as much fun as I did painting & foiling my pumpkins!!!
You can see the Video on my YouTube Channel – make sure to subscribe so you don’t miss anything!!! Jennifer’s Foiling Pumpkin Video
Blessings,
Jenn


