

Want to add some bling to your fall decor? How about covering pumpkins in foil? You can use craft pumpkins or real pumpkins, real pumpkins will last approximately two months if you don’t cut them open. I also suggest you paint real pumpkins first, I recommend Debi’s Design Diary DIY Paints.
In this tutorial I’m using craft pumpkins and I did not paint them first.

SUPPLIES
Pumpkins (real or craft pumpkins)
ArtsSyVille Foil Adhesive
APS Foil
Brushes
APS Glitter
ArtsSyVille Glass Bead Gel
 Start with ArtsSyVille Foil Adhesive and coat your pumpkin while holding the stem. I prefer using an Art Wash Brush for this step. You want an even coat, not too thick, but not too thin. The foil adhesive will go on with a milky white color, but it will dry completely clear. I set my pumpkin on top of an open bucket to allow it to dry so the least amount of surface was touching the bucket. You want it to dry to a firm tack, this could take anywhere from 30 minutes to a couple hours, depending on the humidity where you live. You can even allow it to dry overnight, there’s no risk of waiting too long. Foil Adhesive is water soluble, very easy clean up.
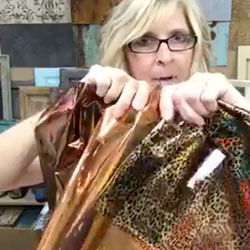 Once your adhesive has dried long enough, cut a few pieces of foil about 12-15” wide. I used two different colors on one of my pumpkins, copper and bronze. Set your pumpkin on a clean surface far enough away from your foils so they don’t stick before you are ready to use them!
 Instead of laying the foil on the surface of the pumpkin, I bunched up the foil, being sure that all the film is on the inside so no film will adhere to the pumpkin, and pounced it on the surface of the pumpkin. This gives the pumpkin a nice textured appearance. As you’re doing this and the foil is being pulled off the film, open the bunched up foil and find a new section to use. You might need to use a couple pieces of foil. Once you’ve pounced the foil around the whole pumpkin, switch to the next color. This method is not going to give complete coverage, but it will give a great dappled texture.
To accomplish more complete coverage, lay the foil over the pumpkin and use a stiff brush to release the foil. Pumpkins with deep ridges will have the foil adhered mostly to the high areas unless you really work it into the crevices. If you have trouble getting tight areas, like under the stem, try balling up a paper towel and using that to rub the foil.

If an area is still really sticky, that means there’s still a lot of adhesive in that area, so go back over it again with some new foil.
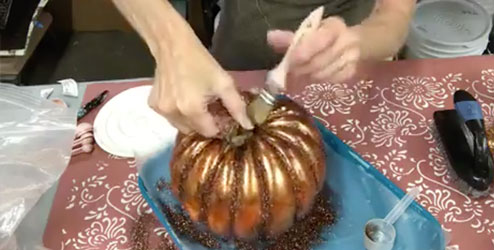
 Now it’s time to glitter! I covered my tray with Press n Seal wrap so clean up will be easy later and I can save any of the glitter that doesn’t stick to the pumpkin. I used a glitter color called Rich Chocolate, I loved how the dark glitter looks really rich with the copper and bronze foil. With the pumpkin on the tray, I just scooped glitter on the top of the pumpkin and into the low areas. Once I had a good amount of glitter on, I shook it and tapped it a bit and even used a soft brush to thin it out the glitter and move it into the crevices. The glitter will stick everywhere there is uncovered foil adhesive. After letting it sit for a bit, you can gently tap the pumpkin to get more of the unsecured glitter off the pumpkin.

 On the second pumpkin I used Seafoam and Rose Gold foils. I cut pieces of the Seafoam foil, approximately 8” lenghts. I needed five of these pieces to cover my medium sized pumpkin.
Before applying the foil, I crunched it first, I feel like this gives a little better transfer, but then I just laid it on the pumpkin and used my scrub brush to get the foil to transfer. Because the pumpkin is not an even surface it’s going to take quite a bit of work to get good coverage. Use a rag or smaller brush to get down into the valleys.
Odd shapes are challenging and you will need to use more foil than you think so that you don’t move the foil to a new area and have an empty area of the film adhere to the surface which can be difficult to remove. Try different transfer methods, a stiff brush, a toothbrush or even your fingers can get the foil to adhere.

If you find that there’s an area that’s not taking the foil at all, if it’s dry to the touch, that area was missed with foil adhesive. You’ll have to go back and touch those spots up with adhesive, let it dry and then reapply the foil.
I didn’t want the seafoam foil to cover completely. Once I worked my way around the whole pumpkin I moved to the second color, Rose Gold. I used this to fill in the empty spots. I had to scrub a bit harder to get this foil to transfer in those spots since the adhesive wasn’t as strong after going over it once.
At the top of this pumpkin I put glass bead gel. ArtsSyVille Glass Bead Gel has tiny glass beads suspended in an acrylic medium. I used a small brush and just painted them on around the stem and out into the crevice areas just at the top of the pumpkin. Don’t let it get too thick, you want just a level row of beads so that it will dry crystal clear. Don’t force dry these, either, allow them time to dry naturally so the gel medium doesn’t haze. It can take a few hours depending on humidity and how thick your application is.

Putting a clear coat over top of your pumpkin is a great idea, especially if you don’t have 100% coverage with foil. The clear coat will make sure there’s no sticky adhesive still on the pumpkin where it could grab on to dirt or other things you don’t want stuck to your pumpkin. Semi-Gloss Final Coat is a great product for this purpose.

I hope you enjoyed this project! If you give it a try yourself, please share your photos on our Facebook page.


