Free shipping on orders over $100! **After discounts have been applied & Continental US only

Jennifer

Fall Ombré Acorn Door Hanger

Apparently, I stocked up on all the fall and holiday wood cut-outs last year, because I keep finding them and it makes me so happy! For this fun fall project, I started with this large acorn wood cutout and decide to create a fall ombré acorn door hanger.
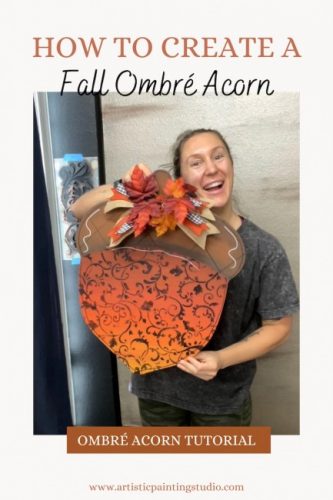
Multi colored ombré acorn with fall leaves

Let’s get started…

First, I grabbed a bunch of Americana acrylic paint colors to create the ombré finish.  Starting with the darkest section, I brushed the paint onto the top from side to side and only came down about an inch or so at a time. While the paint was wet, I picked up the next lighter color and blended it into the first color going side to side and continuing to bring the paint down toward the bottom of the acorn.  You will continue to do this with each lighter color until you are finished. You can use a little water to help with the blending process.  Don’t allow the paint to dry, and continue to blend wet paint into wet paint.

I used another collection of Americana acrylic paints for the top section of the acorn. This time using my darkest color around the outside edge and blending lighter towards the center.

Once all the paint was dry, I grabbed one of my favorite stencils, Nora Paige, in the larger version. I positioned the stencil and taped it to secure it to the bottom section of the acorn.  

Next, you will grab a stencil brush and our APS Foil Adhesive. Use a dry brushing technique, and do not water the adhesive down for this application, you will apply the adhesive on the stencil pattern. It is best to have it thicker so it won’t bleed under the stencil design.

Remove the stencil and allow the foil adhesive to dry for at least 30-60 minutes. The longer it dries the better.  Then use our Glossy Black Foil to cover the stenciled areas and transfer the black foil.

Next, I pulled out my Pasco Paint Pens and added some hand-painted detail with Black and White pens. Finally, you will want to topcoat with Modern Masters MasterClear to protect your gorgeous piece of artwork.

To finish off my fall ombré acorn door hanger, I created a fun bow with ribbon and fall leaves and attached it with a glue gun! Now I have the perfect door hanger for fall.

Supply List:

Xo, Jenn

DIY Foiled Teal Pumpkin: Foils & Fauxy Rollers

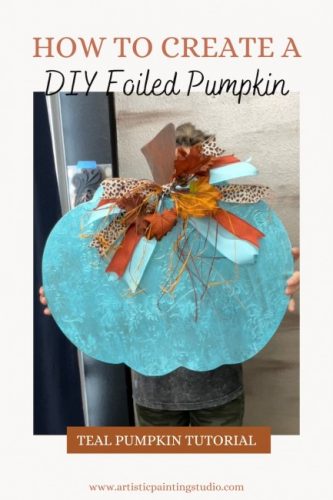
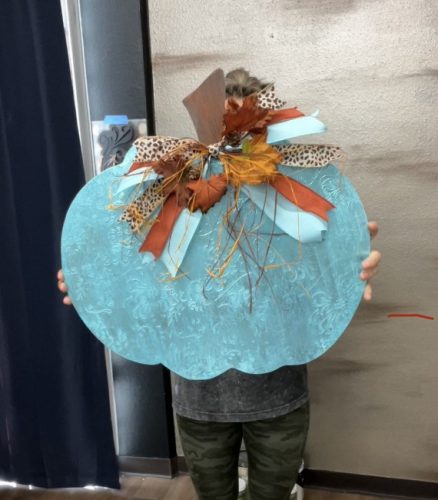
Is anyone else obsessed with off-the-wall colored pumpkins for fall?? I love creating these large pumpkins to hang around during the fall season! This DIY Foiled Teal Pumpkin was so fun to make and took me more than one shot to get exactly what I was looking for.

I love decorating for Fall! I feel like we can use this décor longer than any other season, going from Halloween to Thanksgiving so seamlessly.

This pumpkin was super fun to create even though I did do a re-do on this one!  Yes, you read that correctly… Even I sometimes go too far and have to redo something LOL!

Large teal pumpkin with orange, teal and animal print ribbon

But let’s get started on the process that I used…

I found these large pumpkins left over from last year (guess I bought a few extras) and decided I wanted to use one of my fauxy rollers!   

Then I troweled on our Texture Medium with the mini trowel applying a layer that is about 1/16” to 1/8” thick. You don’t need too much to get a great print from the rollers. Then I used a chip brush to create the texture on the stem, creating a little wood grain look.  

While the Texture medium was wet, I rolled through it with our Chrysanthemum Fauxy Roller design.  

You will need to allow the Texture Medium to dry for several hours which will depend on how thick you applied it. I usually allow it to dry overnight and once it’s dry, I sand off the high rough areas.  

Then I used a couple of acrylic paint colors together to create a little blending in the base color.  I used three different teal Americana Acrylic colors.  You can add a little water to help with the blending process when brushing on several colors at the same time. Then I allowed my paint to dry completely.

Once the paint was dry, I wet sanded over the design to highlight the pattern.  I sprayed the water onto the sandpaper to keep the sanding to as little mess as possible and only sanded over the design to highlight the edges of the pattern.  

This is where I got carried away!!

Y’all know I love animal print and I always say it’s my favorite color!  LOL!  So I decided to add some patches of animal print foil and it was just too much with the roller design… A total overkill!  But the process I used was randomly applying the foil adhesive here and there… allowing it to dry and then foiling those random areas.

It just got too busy for my personal taste and I painted back over the entire pumpkin!  A girl has to do what she feels is best and sometimes that is to start over.  

Once I painted my pumpkin again with the same acrylic colors, this time there were more layers of paint and the wet distress sanding technique wasn’t working to highlight the design like it did with the first layer. So, I grabbed one of our Filbert Brushes and dry brushed on some darker color to highlight the design.  

Then once the paint was dry, I applied a layer of Foil Adhesive to the entire pumpkin. Once this dried for about an hour, I used our Aquamarine foil and foiled the entire pumpkin. This second attempt was more of what I was looking for and turned out stunning.

Make sure to topcoat to protect the surface. If you are planning to hang outside, grab our Modern Masters MasterClear Supreme, it’s exterior-rated and will protect your foils from the sun. 

Teal pumpkin with shiny metallic foil and blue, orange and animal print ribbon

I added a fun “messy” bow to finish off the look, adding some of my favorite animal print to the ribbon.  Now my DIY Teal Foiled Pumpkin is ready to hang anywhere in my house! Hang on any door or wall for some fun festive fall decor!

Supply List:

Texture Medium

Chrysanthemum Fauxy Roller

Acrylic Paint

Foil Adhesive

APS Foils

Aquamarine Foil

Ribbon

Xo, Jenn

Buffalo Plaid Door Hanger Tutorial

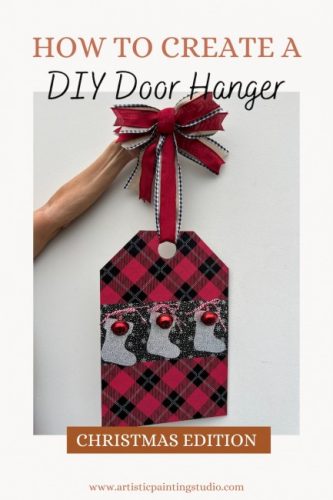
I always love creating something new for our front door and side gate to decorate for the Holidays! Since Christmas will be quickly approaching, I created this super cute Buffalo Plaid Door Hanger using a few of our favorite APS Foils: Elsa and Buffalo Plaid.

Red and Black Buffalo Plaid Door Hanger with Mini Silver Stockings and bells

I started with a wooden “gift-tag” cut-out and base painted it with Bondago in the color black.  Then I allowed this to dry completely and I taped off a section to leave black.  I measured and drew lines to keep everything straight and then applied foil adhesive to the top and bottom sections. 

Once the foil adhesive was dry, I allowed it to dry for about an hour, I transferred our fabulous Buffalo Plaid foil. This foil releases so well and created a fabulous plaid finish in just seconds (so much easier than painting plaid)!  

Then I applied our Golden Paintworks topcoat to protect the foiled sections.  This was done to make sure when I taped again it would not damage the foiled areas.  

Once this way dry, I taped off again to isolate the middle section and apply the foil adhesive just to that area and then I removed the tape.  

Buffalo Plaid & Snowflake door hanger with silver mini stockings

When the foil adhesive was dry, I transferred our new Elsa foil (the cutest snowflakes)!  Elsa is a transparent foil, so you want to make sure when using this foil that you have applied a color to the surface that you want to see through the foil.  I left it black for great contrast for the snowflakes to pop.

The cute little stockings were found at the Dollar Tree. I painted them with black Bondago as well and allowed the paint to dry. Once the Bondago was dry, I applied foil adhesive.  

Once the foil adhesive was dry, I transferred the Twinkle Silver foil to all the stockings.   Make sure to topcoat these as well to protect the foil. 

I then grabbed some red/white string and bells. I added these to the stockings and attached them to the wood tag with my staple gun.  

Then I found some beautiful ribbon to create a simple bow!  Now it’s ready to hang our Buffalo Plaid Door Hanger and impress all of our guests this holiday season!

red and black buffalo plaid door hanger tag with silver stockings

Now it’s your turn! Make sure to share your buffalo plaid door hangers with us, we love seeing what you are creating with our APS Foils 

Supply List:  

Wooden Door Hanger – Gift Tag

Bondago Black

ArtsSyVille Foil Adhesive

APS Foils:

Buffalo Paid

Elsa Snowflakes

Twinkle Silver

Golden Paintworks Topcoat – Satin

Red/White String 

Bells

Ribbons

Xo, Jenn


Super Easy Gold Foiled Ceiling

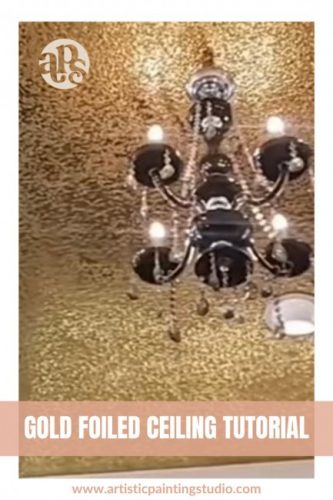
Talk about an absolutely stunning wall or ceiling! This is an amazing and easy finish if your world needs a little bling!

gold foiled ceiling

Super Easy Gold Foiled Ceiling

One of the fabulous things about this finish is it looks great on “knock-down” textured ceilings and walls! No need to float the surface first for this finish.

You can achieve this look in any color you desire, we are featuring a Gold Ceiling.

First, we started with Modern Masters Metallic Paint Olympic Gold, but Pale Gold will work as well. You will love the Modern Masters Metallic Paints. They paint on so well and most colors will give you coverage in two coats!

You will paint your ceiling or wall with two coats of olympic gold paint and allow it to dry overnight. Metallics can be soft and take a little longer to dry, so make sure you give them enough time to dry fully.

Then you will apply your Foil Adhesive to the entire surface. Just roll it on with a low nap roller. Allow the foil adhesive to dry for at least several hours. Remember you are working with metallic paint and you want to allow things to dry longer than normal.

Now, we will transfer the beautiful 14 Karat Gold Foil. Place your foil on the surface with the pretty side facing you and scrub/rub the foil to transfer it to the surface. You only want it to cover the high areas and not scrub it into the lower areas so that you will have both sheens from the paint and foil!

Lastly, you will need to topcoat this finish to seal over the foil adhesive that doesn’t have foil on it. Make sure to use a gloss topcoat so you don’t diminish your bling!

Xo, Jenn

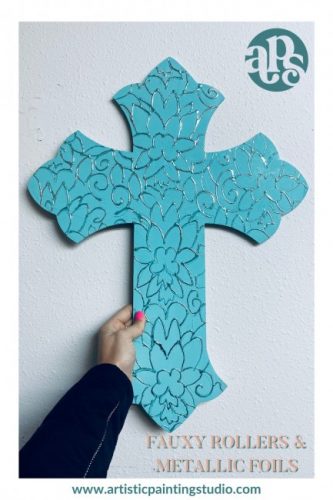
Lotus Flower & Metallic Foiled Cross

Here is a super fun project to create!  If you have followed me for any length of time, y’all should know I love different products and love using them together to create depth and this one uses a few!

I started out with the great wooden cross which is about 20” tall. We have a few of these available in a couple of different sizes.  They are all made of high-quality wood or MDF which shouldn’t need any sanding before you start your project which is super nice!

Lotus Flower & Metallic Foiled Cross

Next, you will grab some of our fabulous Texture Medium and our Mini Trowel which we absolutely LOVE for small surfaces and tight areas.  Apply a thin layer of the texture medium onto the surface, you only need it to be around 1/8th to 1/16th of an inch thick. It really doesn’t take much to create an imprint from the rollers.

Once you have the surface completely covered, I usually take my finger and wipe off any excess that has gotten onto the edges (easier to clean up now when wet than having to sand later).  While the texture medium is wet, you will roll the Lotus Fauxy Roller through the wet material.  Just start at one end and roll straight through to the other end. I went down the middle of the cross and then rolled each side.  As you can see, I didn’t bother to try and line up the pattern and it looks fabulous. So don’t worry about that!

You will now need to allow the texture medium to dry. This will take a few hours depending on how thick you applied the material.  I usually wait about four hours or leave it overnight to dry.  Once it’s dry you will need to sand down any rough areas that peaked from the roller, but just a light sanding is all that should be needed. We don’t want to sand too much and lose our pattern.  Dust off the surface and we are ready for our next layer.

Next, I painted the entire cross with the DIY Chalk Paint by Debbi’s Design Diary in the shade Old 57! One of my favorite colors!  Make sure you have complete coverage. One or two coats should give you complete coverage, and then you will allow your project to dry.

For the next step, I grabbed our DecoFoil Liquid Adhesive which has a tip that you cut off. Depending on how much you cut off the tip, will determine the thickness of the line it will create.  I usually cut off just a little to keep my line thin, but that is a personal preference. For this project, you can have a little thicker line if you want.

You might want to practice on a piece of paper first to get the hang of how much comes out and draw your lines before starting on the project.

All I did was trace the pattern created by the Lotus Roller.  Trace as much of the design as you would like. I traced the entire pattern and then allowed the adhesive to dry.  This adhesive will take about an hour or so to dry, it will go from milky white to completely clear and remain tacky for a long time.

Once the adhesive was dry, I used our Bright Silver Metallic Foil and laid it over the adhesive. I scrubbed with a nail brush or toothbrush to transfer the foil to the surface.

When you are done with everything make sure to apply a layer of Topcoat to protect all your beautiful work! Add some ribbon, a bow, or embellish as you would like to create a fabulous door-hanger!!

Xo, Jenn

Simple Epoxy Pour Over Metallic Foils

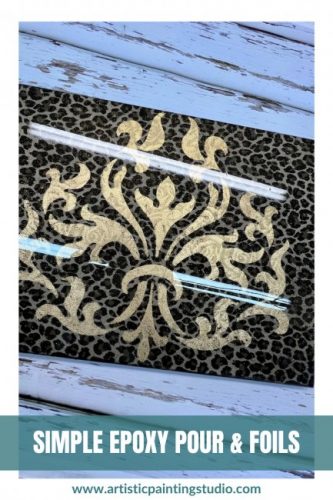
I absolutely love playing with Epoxy!!  This is such a fun medium to work with and you can do so much with it. We currently use the Liquid Glass Epoxy which we carry kits in 4 different sizes, so no matter what size your project is we have a kit that should work for you. Today I am going to be showing you a simple epoxy pour over metallic foils.

Simple Epoxy Pour  & Foils

Just like other Epoxy products, this is a two-part epoxy and has to be mixed at equal parts.  I like to mark my bottles with a Sharpie so I don’t get them mixed up. I label the Resin “A” and the Hardener “B”.

Then when I am pouring the mix, I add part “B” first into my measuring cup and then add part “A”. These should both be equal amounts.  Stir very well for about 2 minutes, scraping the sides and bottom of the container as you mix.  Then pour the mixture over your project!

In this video, I am using the Liquid Glass on a foiled board that I created. This was done with metallic foils, Wild Leopard Spots Large Gold, and Ramsey Rose Gold.

Make sure that your surface area is level when doing an epoxy pour. This is very important so that the epoxy will self-level and be even across your surface area.

Using my hands, I move the epoxy across the surface and then over the sides of my project.  To bring the bubbles to the surface, I use a blow torch keeping it away from the surface about 8 to 10”, and make sure to keep moving the torch at all times. You do not want to burn the surface of the epoxy.  But the blow torch will bring the bubbles to the surface and clear out the epoxy.

Then you will let it sit and dry. This will take hours… I usually don’t move my projects for at least 4 to 8 hours.

This project was turned into a serving tray by adding handles to the top side and ball feet to the bottom!!

Xo, Jenn